Creating the first environment
How to start
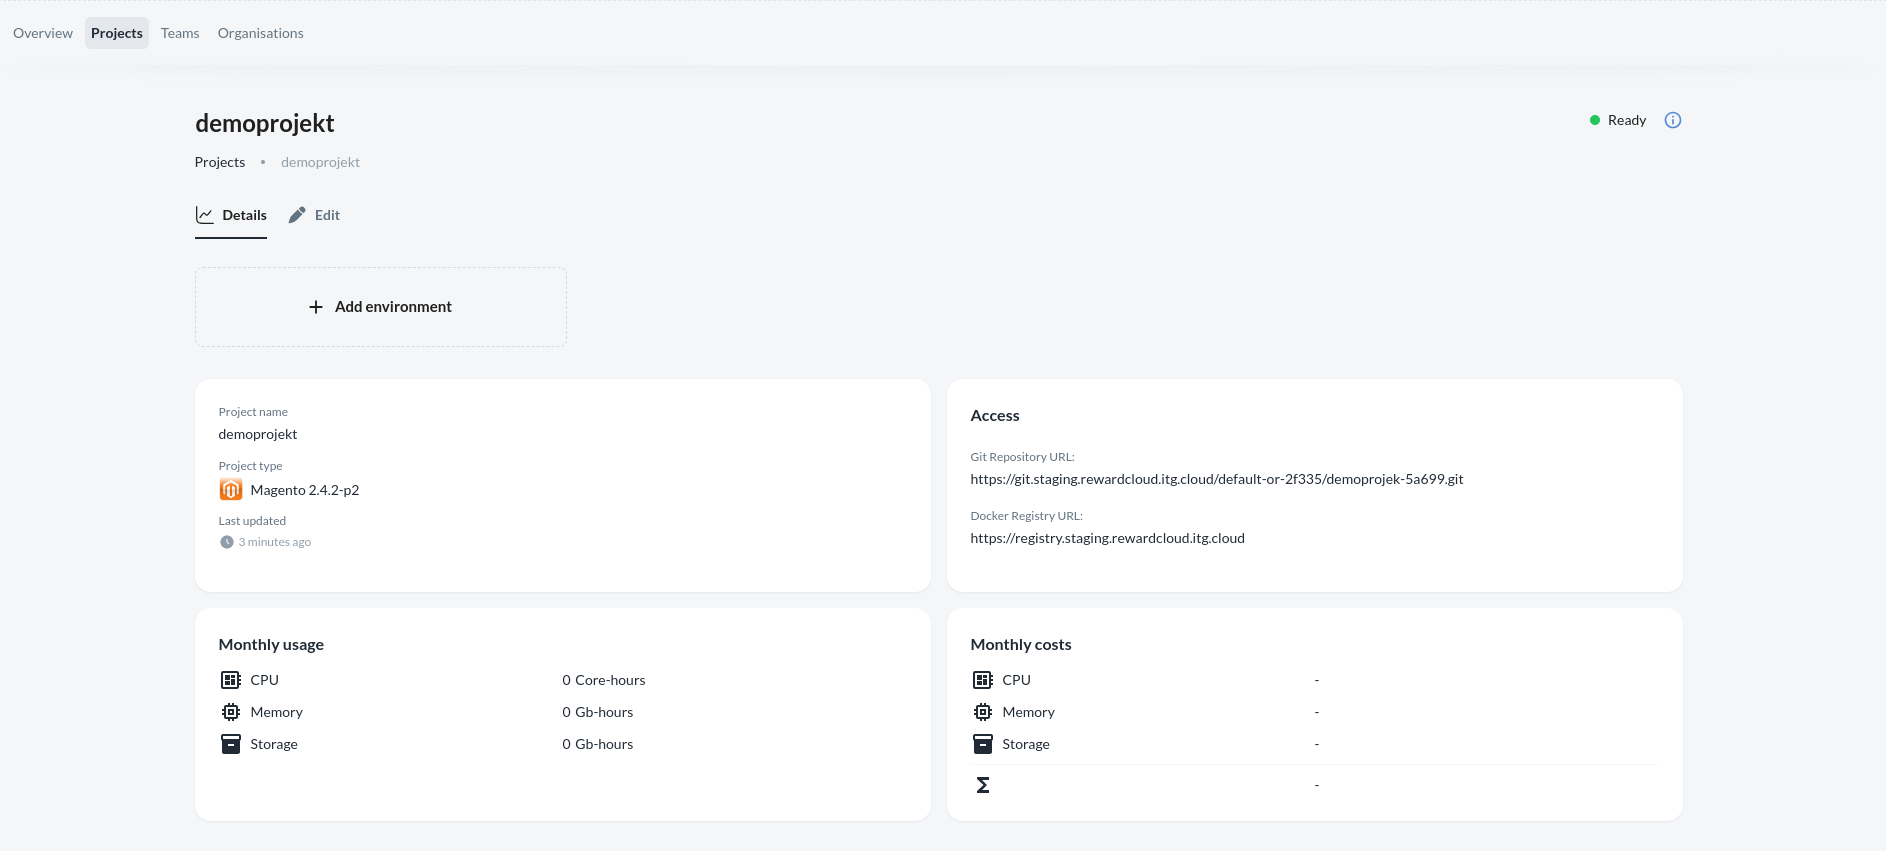
If you already have a project, you can initiate the creation of an environment. Begin by navigating to your project and then accessing the "create" button located in the top right corner.
Details Step:
The initial step requires providing a name for the environment, which should match the branch name from which you intend to create the environment. However, there is an option to override this by checking the "Use different name of the branch" checkbox. In this case, regardless of the environment name provided, you can specify the branch name you wish to utilize in a separate field.
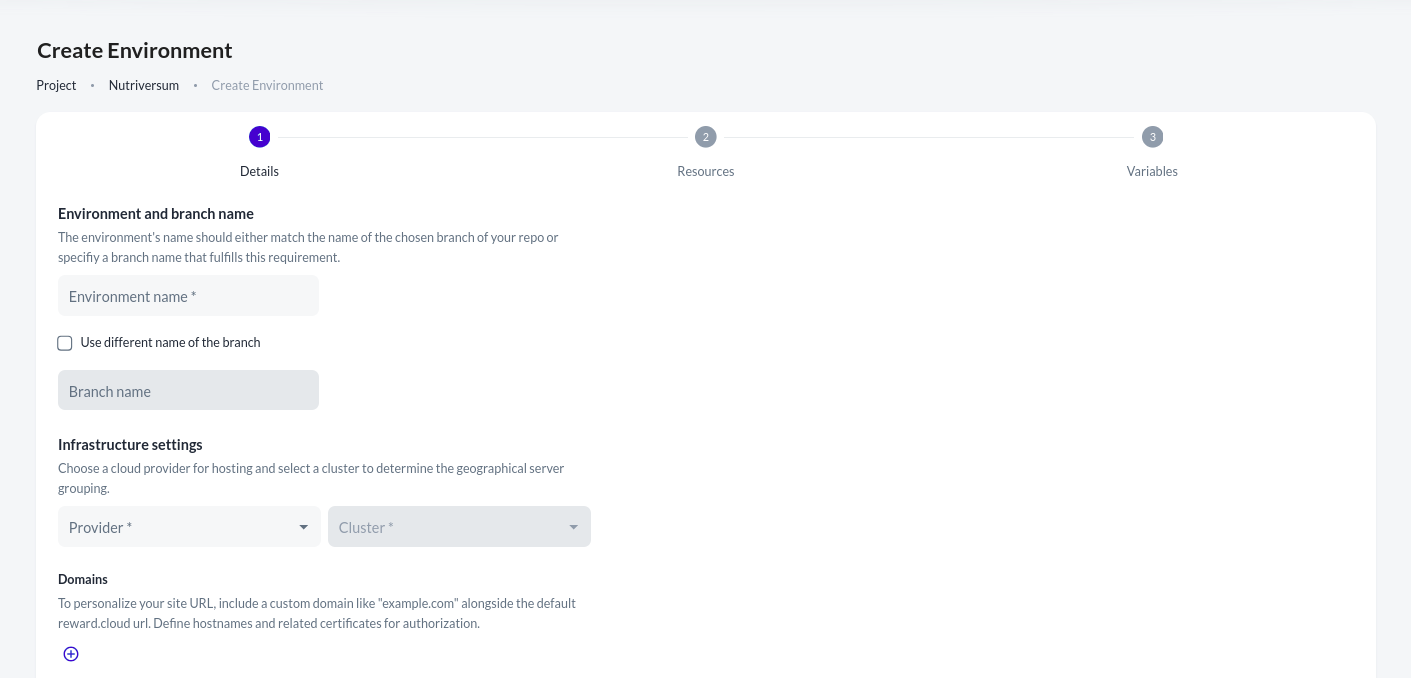
Next, you can specify the provider and cluster from the dropdown menus. Below this, there is an option to set up a custom domain for the upcoming environment, although this step is not mandatory for environment creation. Further details on this option can be found here.
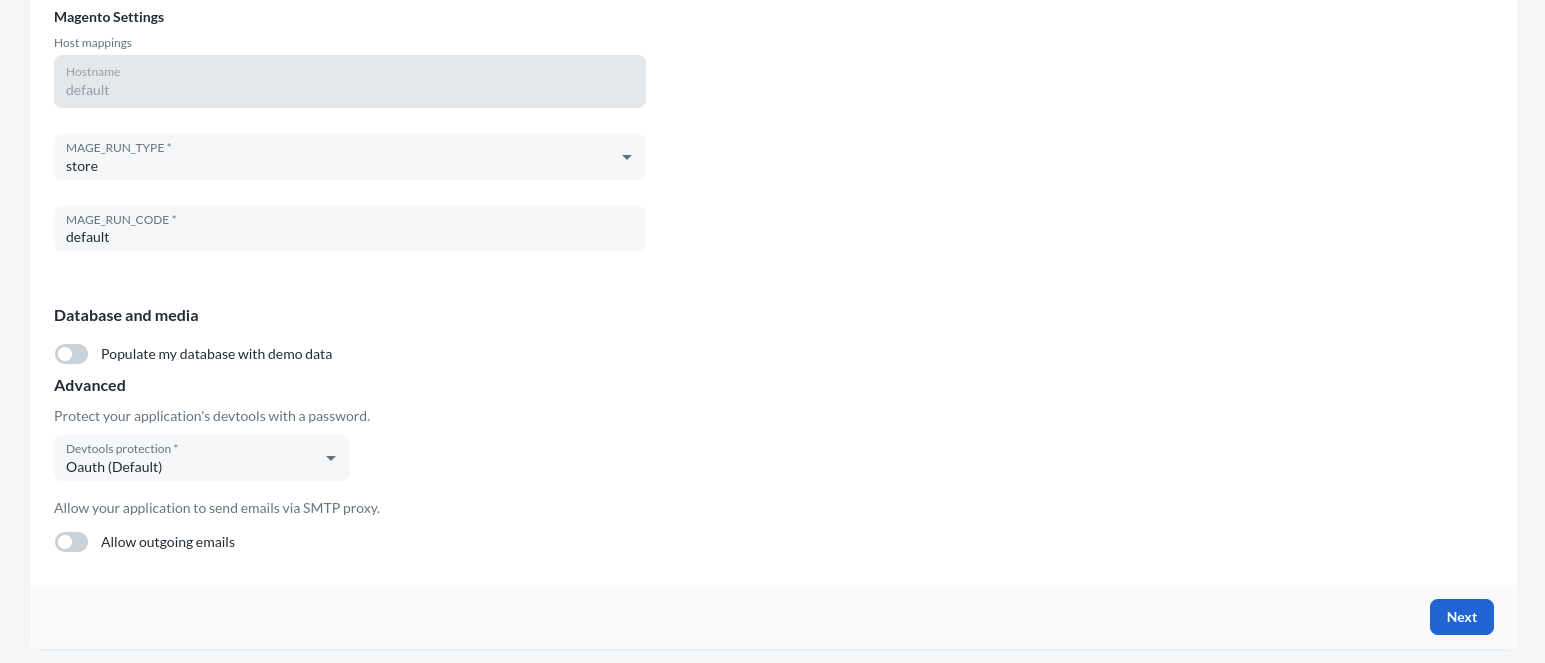
Additionally, you can indicate whether to populate the store with sample data, which is particularly useful when initiating an empty Magento instance and requiring content inclusion. You can also configure whether to allow outgoing email or utilize a mailbox instead. Under the Advanced tab, you have the ability to set up devtools protection using oauth or htaccess, determining the method for accessing mailbox, phpmyadmin, and the admin page of other components.Resources Step:
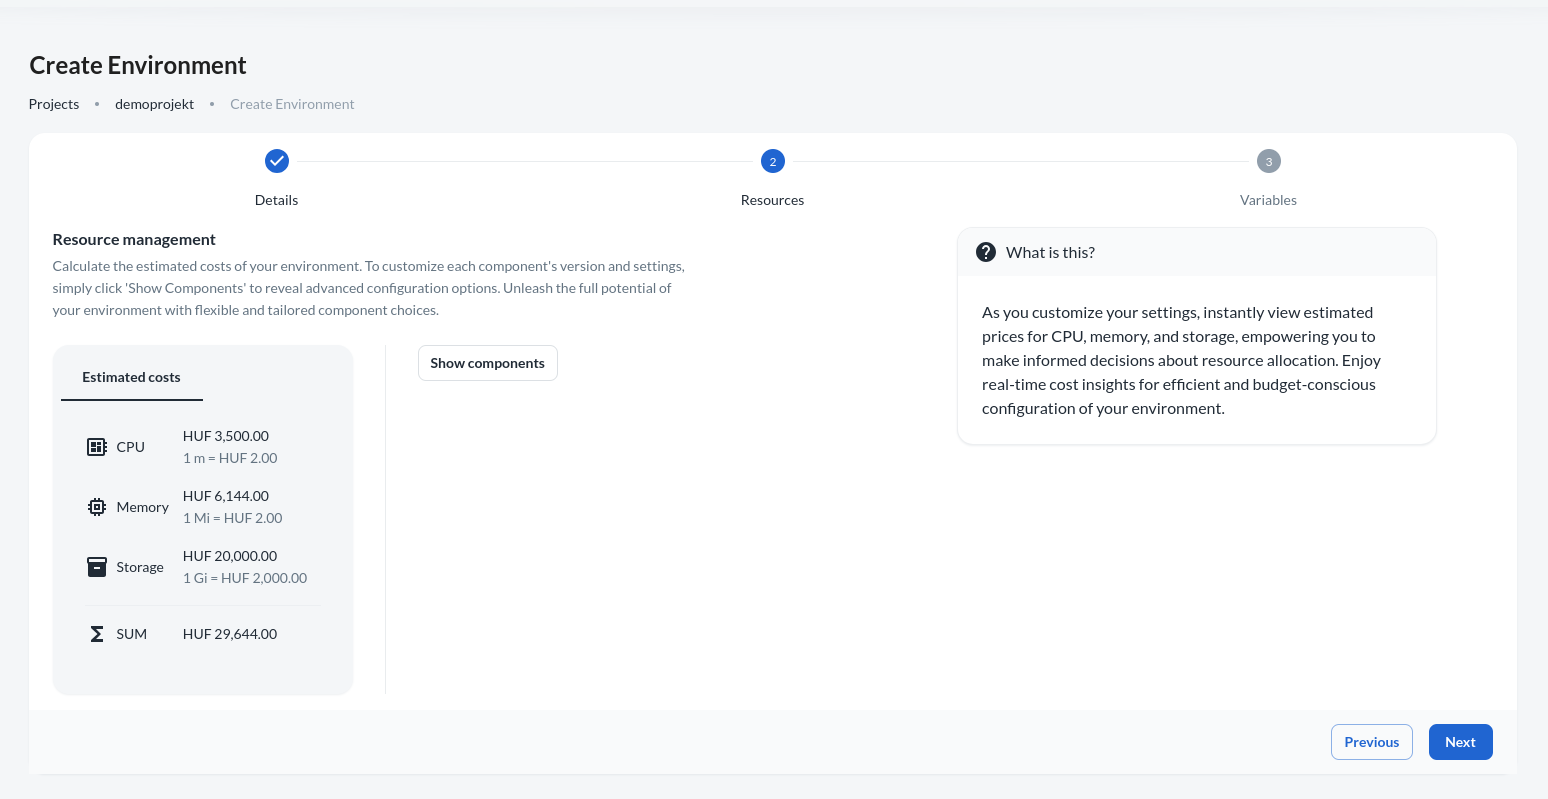
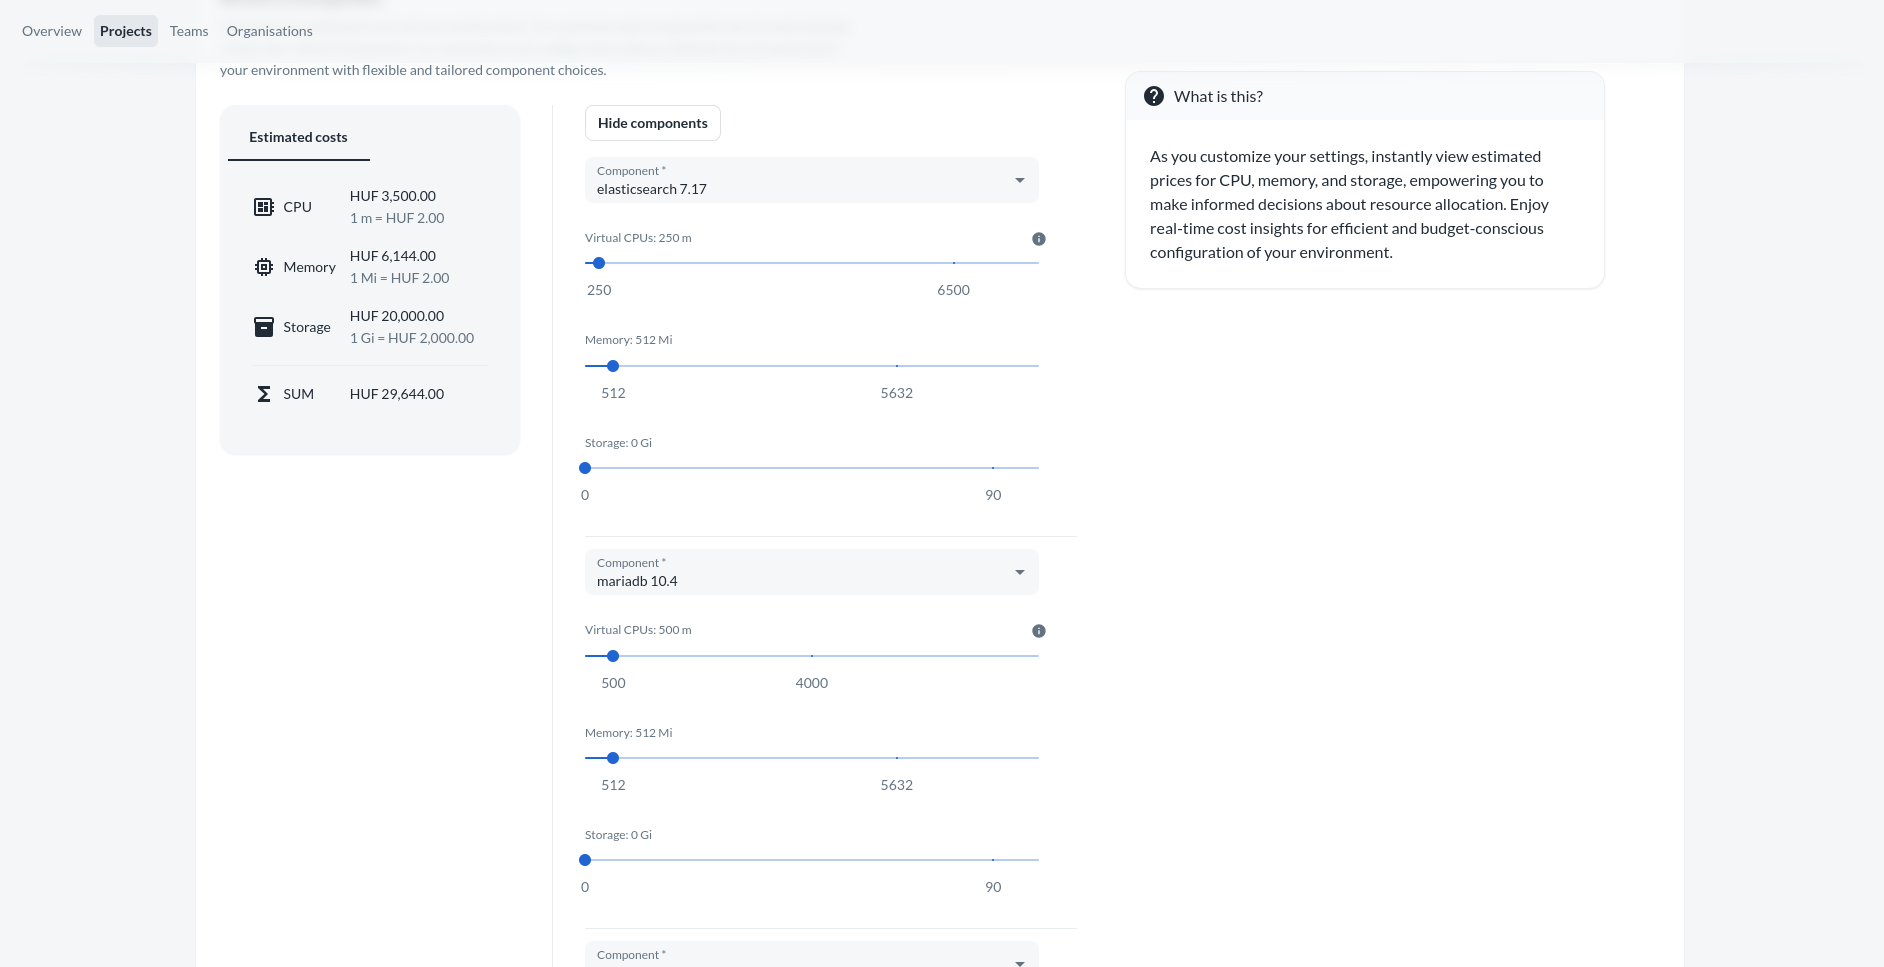
Configuration Step:
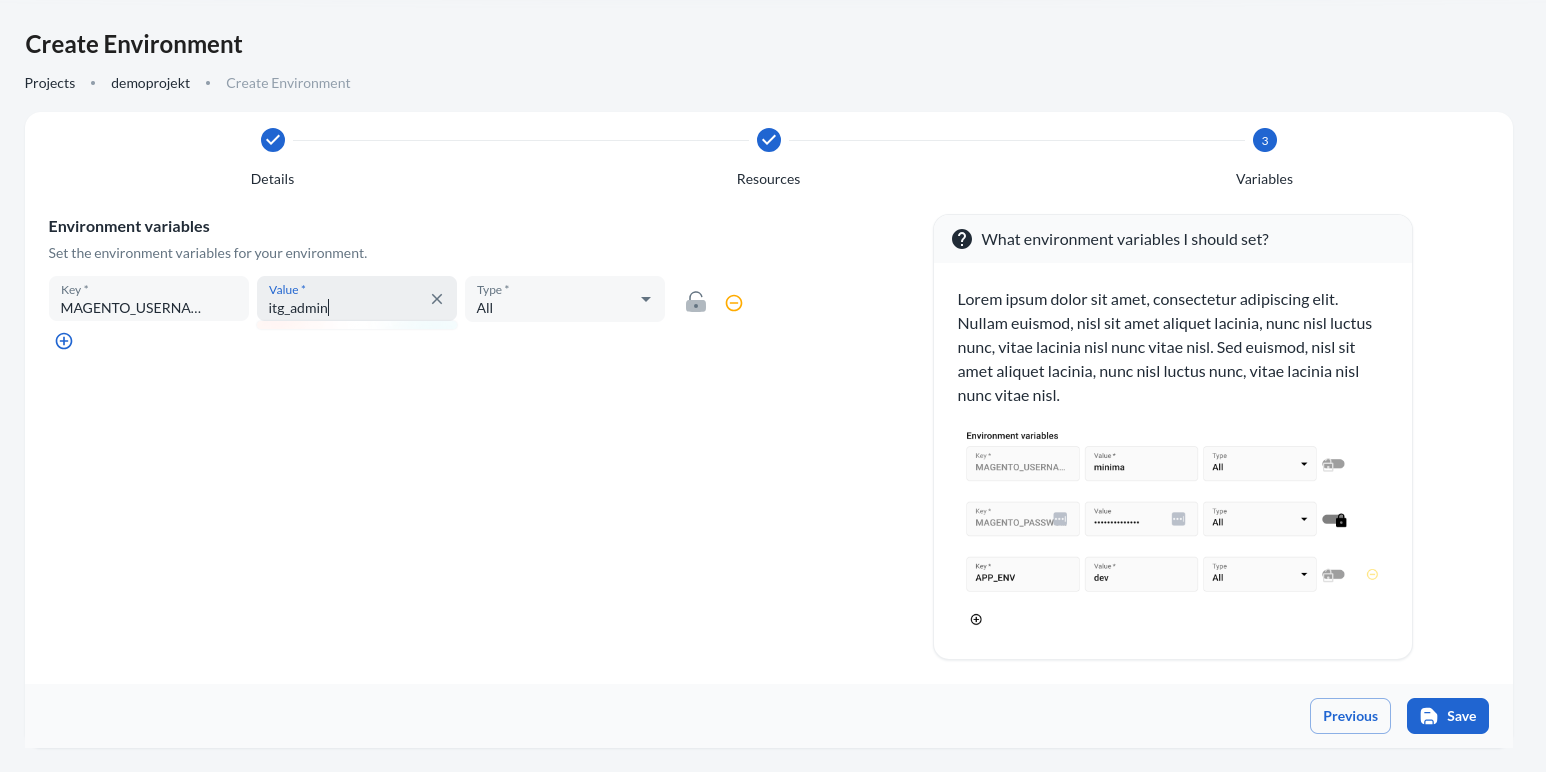
In the configuration step, you can define environment variables that your project can utilize during build or runtime. For instance, the magento username and password variable can be specified. Upon clicking Save, the environment creation process commences. The progress of this process is indicated in the status bar located in the top right corner. During environment creation, you have the option to monitor logs and perform database imports. Further information on logging can be found here, while details on imports are available here. Once the environment is created, access fields become visible.
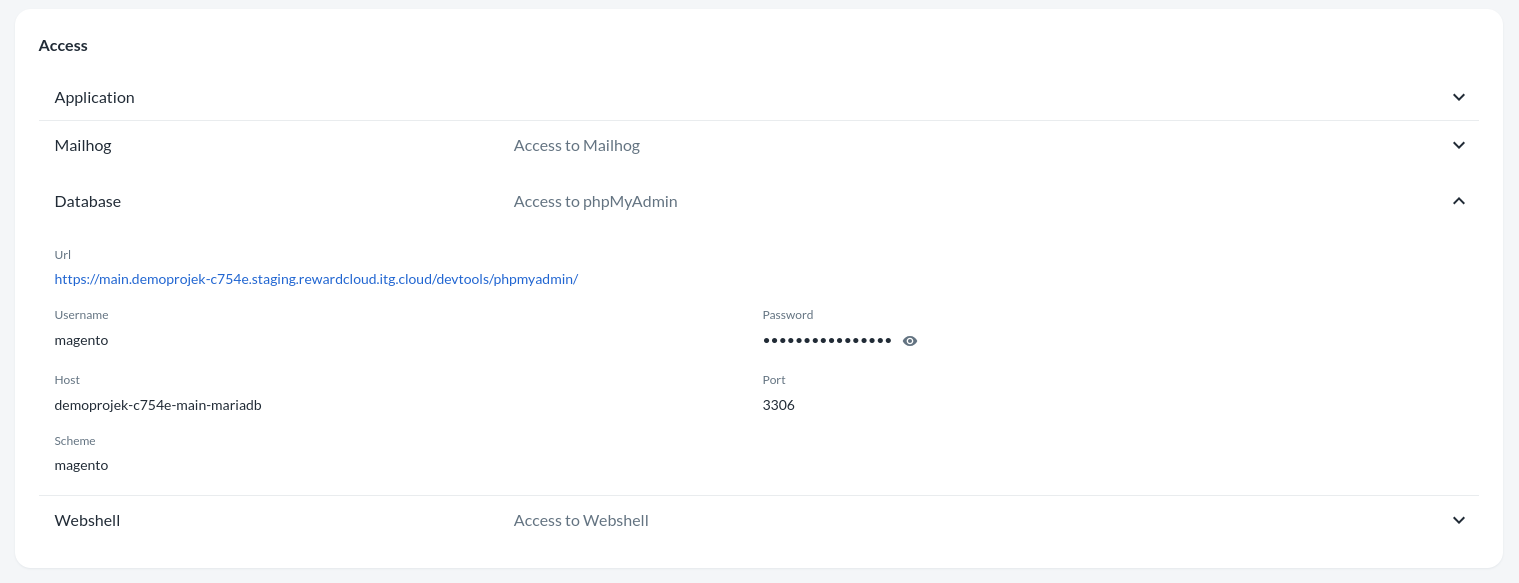
Access:
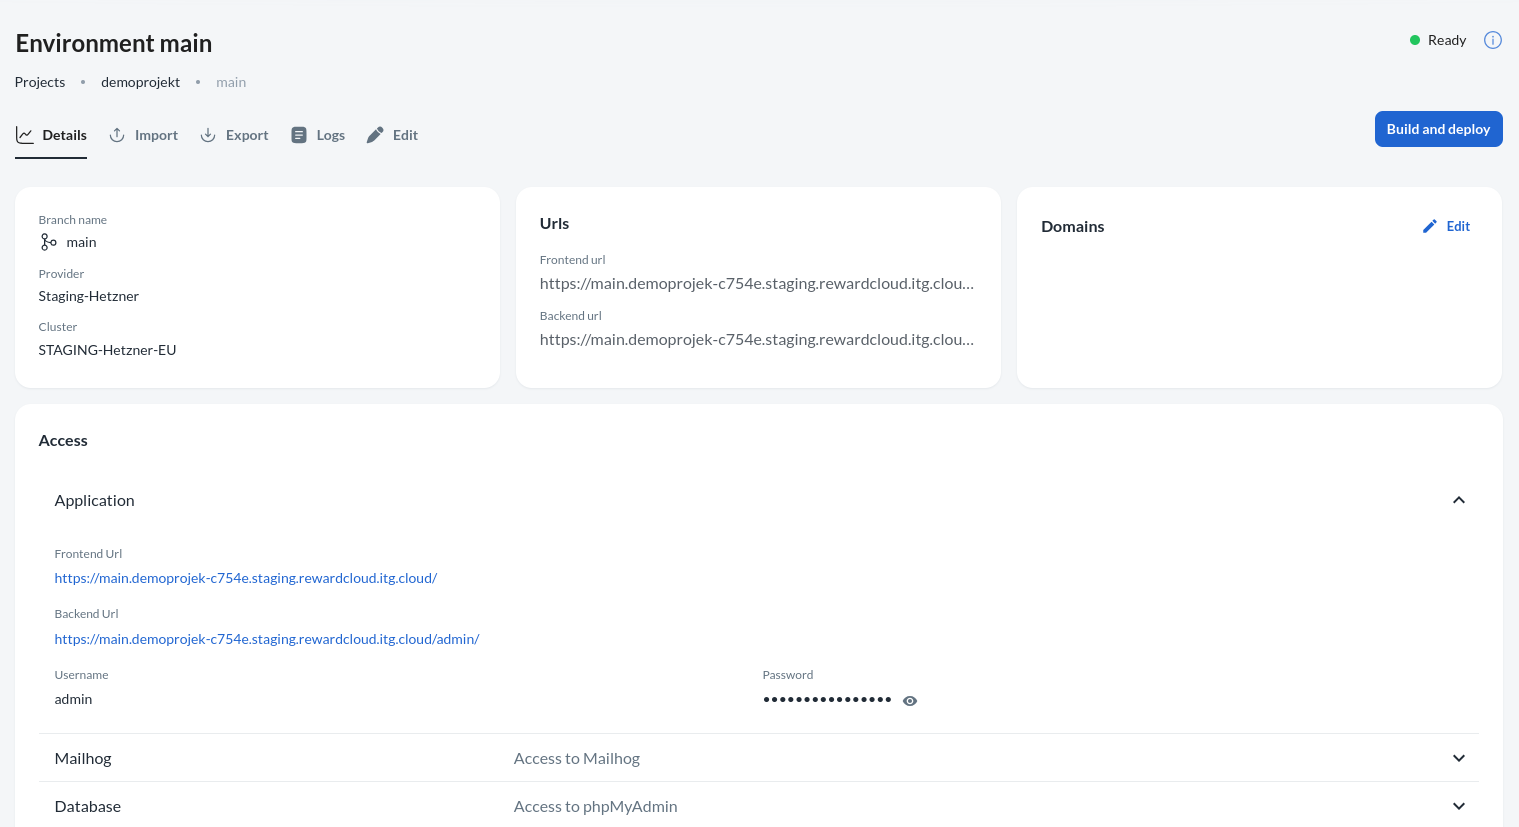
Upon completion of the build and deployment process, the status changes to Ready. Access credentials necessary for managing and accessing the environment are displayed on the site beneath the details tab. If htaccess is selected in devtool protection, this information is required to access the login pages of all components.
Logs:
While the environment is being created, real-time logs can be viewed to track progress. To do so, navigate to the Logs tab and select log types from the Filters dropdown menu. Multiple filter types can be selected simultaneously, followed by clicking the Start streaming button to initiate the log stream.
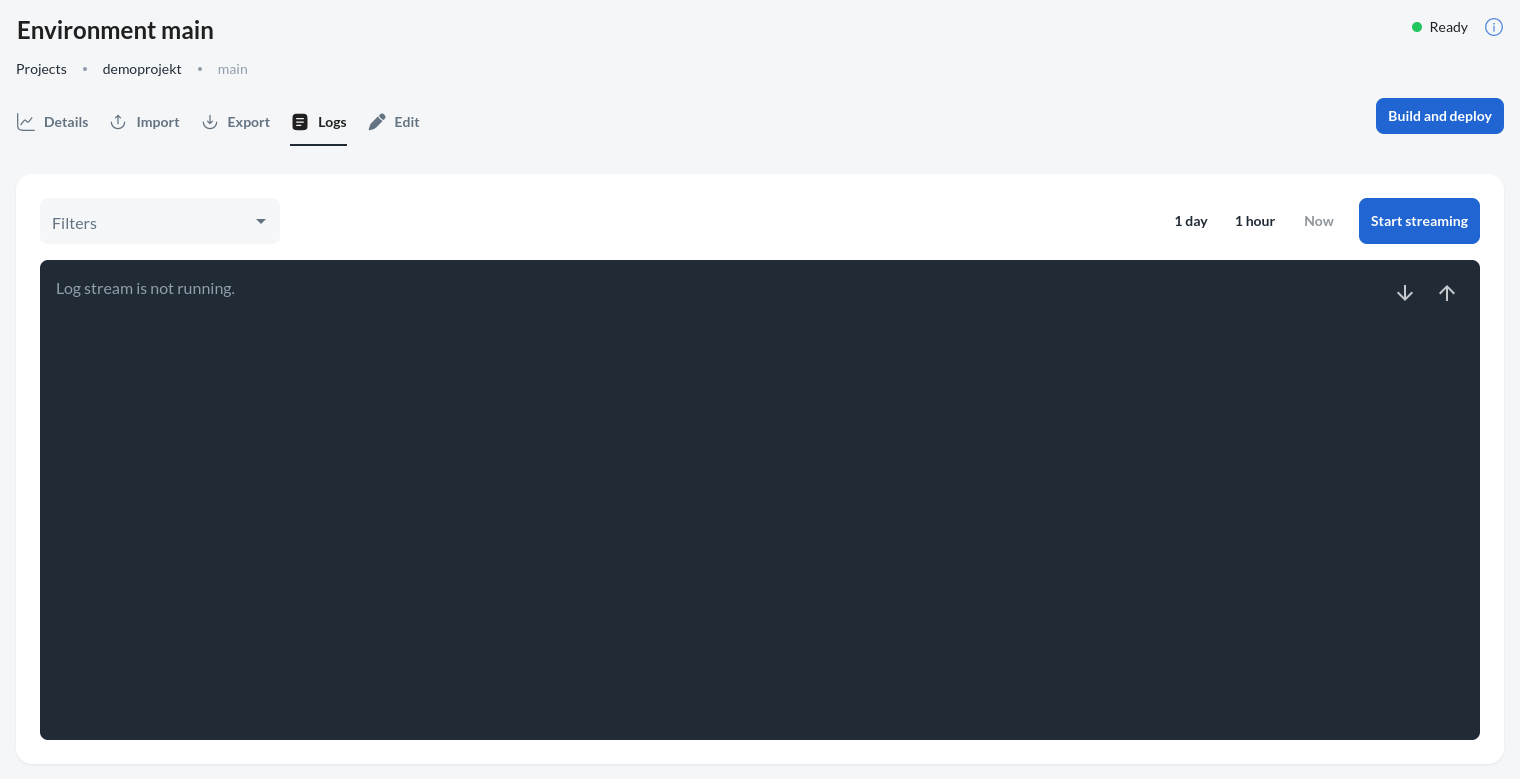

Users also have the option to select the logstream offset, which determines whether logs from one hour or one day prior to starting the stream are displayed.
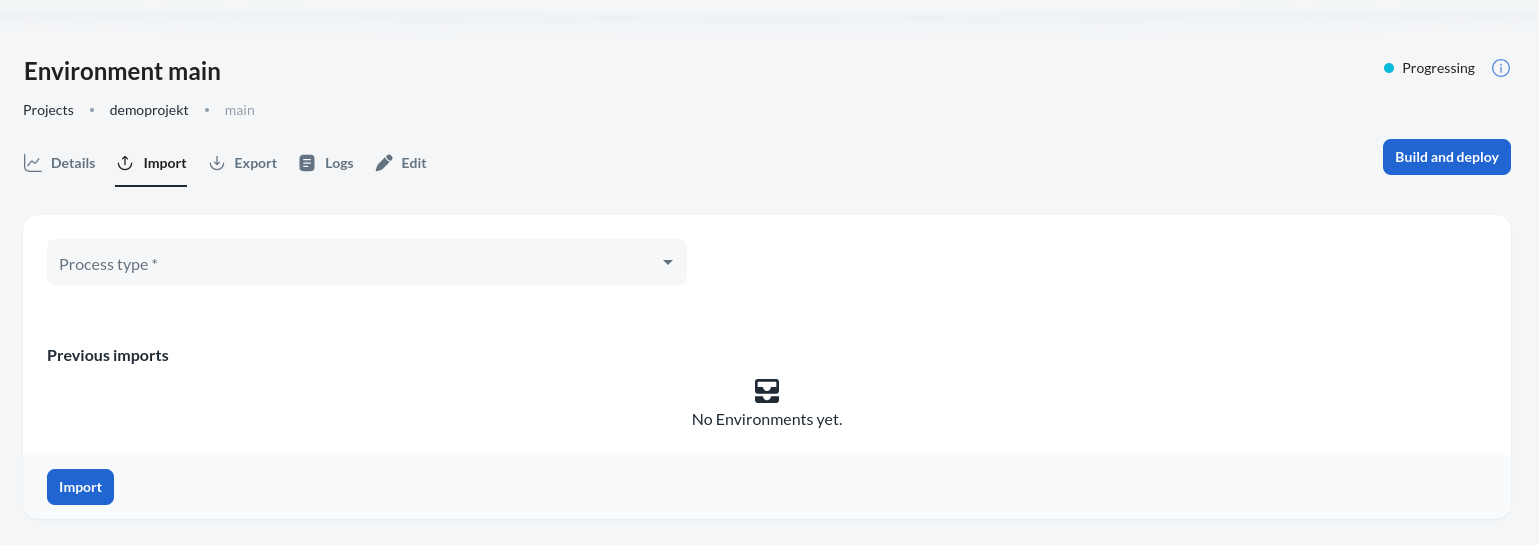
Import:
Databases and media can be imported into the environment. To accomplish this, navigate to the environment detail page and click on the import button located in the top right corner.
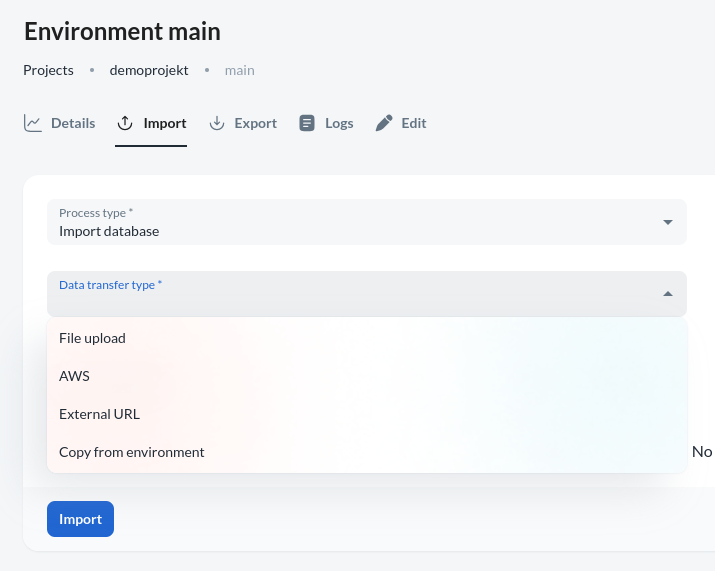
File upload
For file upload, specify whether to import a database or media. If selecting database, two additional options will appear:
- Clean up : Remove previously uploaded data
- Fix urls : Fix URLs in the database to point to the REWARD environment
External URL
To import from an external url, works the same as in the first point, except that we don't upload the file to the REWARD repository, but we specify the path of an uploaded file.
Copy from environments
If you already have a ready environment, you can import the database or media from it. To do this, in addition to the File upload options, you need to specify the name of the source environment.
AWS
There is also possible to import files from AWS S3 bucket. To do so, specify the region and the endpoint url of the bucket, as well as the AWS access credentials and the name of the bucket and the file path in bucket.
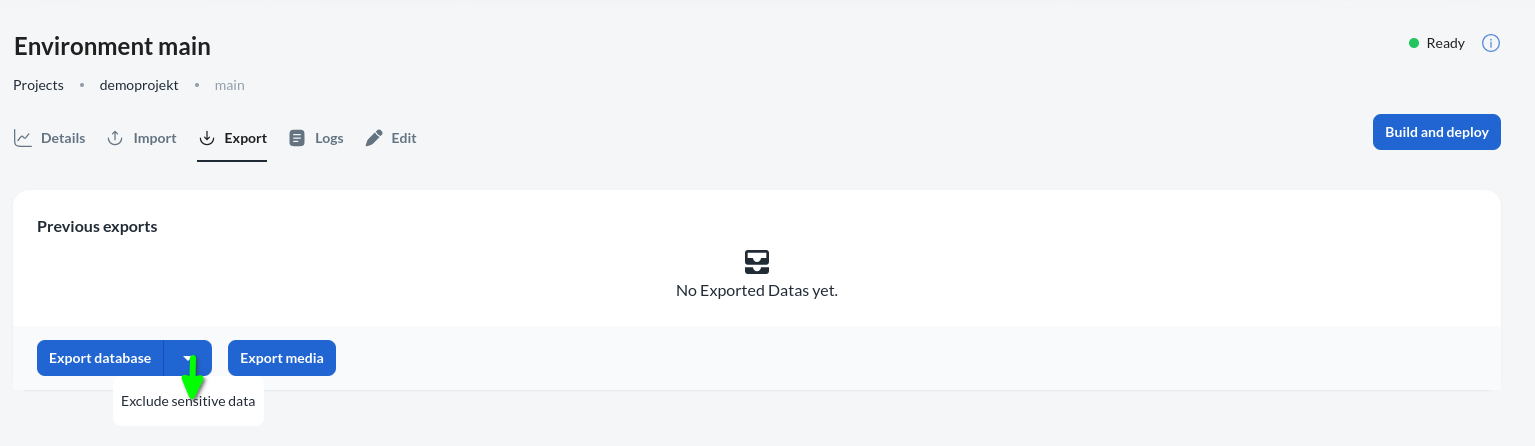
Export:
Exporting a database or media is possible. Database export includes an option to determine whether sensitive data (e.g., passwords) should be exported.